These basic tips will get you perfect measurements for window curtains and draperies!
-
Basic Measuring Tips
- Use a steel measuring tape.
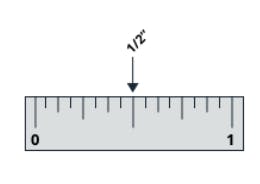
- Measure to the nearest 1/8" of an inch, if the size is on a 1/16" mark, then round down to the next 1/8".
-
Curtains and draperies bring classic elegance to your home with their long, flowing style and eye-popping colors and patterns. Here are instructions on measuring windows for curtains, which are usually mounted outside the window frame.
Please note that these are just guidelines. You can add size to your curtains as desired.
What You Will Need
- Steel Tape Measure
- Step Ladder (if necessary)
- Pencil
- Blinds.com Measuring Worksheet
Helpful Hints Before You Begin Measuring Windows for Curtains and Draperies:
- For the most accurate measurements, only use a steel tape measure.
- Don’t mix up width and height measurements. Always follow the width by height format (W x H) and mark them as such.
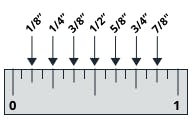
- Measure to the nearest 1/8 inch. Never round up or down to the nearest half or whole inch.
- If you’re measuring for more than one window, measure each one individually – never assume that your windows are the same size, even if they may look alike.
Step 1: Determine drapery rod placement
The length and style of your drapes will be affected by where you mount the drapery rod. To make the window appear larger when the drapes are closed, and to show more of the window when they’re open, we recommend:
- Mounting the rod 6" above the window (if space allows)
- Extending the rod 6" on each side of the window (for a total of 12")
Note on Inside Mount: While you can do an inside mount for curtains, outside mount is far more common. If you wish to inside mount curtains or draperies, please call 800-505-1905 to speak with one of our Design Consultants.
Step 2: Determine the width you’d like
When placing your order, select the exact width you want your panel(s) to cover. You’ll usually choose one of two options: side panels only or full-coverage panels.
Understanding fullness: It’s important to note that your custom drapes will be made at 200% to 300% fullness, which refers to the extra fabric that goes into the drape. For example, if you order a width of 24”, your drapes will be made with at least 48” of fabric and pleated down to get a 24” width. This gives the drapery a textured look and keeps it from looking flat when closed. However, you may want to order a smaller width if you’re concerned about having too much fabric.
Side Panels: Side panels are mainly for decoration, and provide less privacy. This style is not meant to close all the way, instead hanging at the sides of the window. To measure for side panel width, simply measure the width you need the panels to cover, and order at exactly that width. For instance, if you’d like your panels to cover 24", enter 24” as your width. Side panels can also be collapsed to cover less space when desired.
Full Coverage Curtains: If you’d like full coverage, you’ll need enough panels to cover your entire window. Here’s how to measure:
- Measure the width of the window opening from outside edge to outside edge of the window casing.
- Add 6" to each side (12" total).
- Take the total number (your measured width plus what you added to each side), and divide it by the number of panels you want to order. The most common is a center split, which consists of two panels that open to the sides.
- Order each panel in at least the width you calculated from Step 3.
Example: To cover a 48" window with two panels, you would add 12" to 48" (your measured width) and divide by 2 (number of panels) to get 30". The two panels ordered each need to be 30" or wider.
Step 3: Determine the length you’d like
Once you’ve determined where you’ll mount your drapery rod, you need to determine your Rod to Floor Height. Here’s how to measure:
- Use a pencil to mark where you will mount the brackets for your drapery rod.
- Measure down to where you want the curtain to hang (usually the floor or bottom of the window).
- You will use this measurement as your height when ordering. However, do not hang any hardware until the drapery arrives.
Step 4: Choose Your Curtain or Drapery Style
The following styles are recommended for curtains and draperies:
Valance
- Choose a length from 10”-30".
- This style is often used to add the appearance of height to a window.
- This is a recommended style for outside-mounted curtains.


Floor
- Choose length that will fall 3/8" above the floor.
- This style is recommended for drapes that will be opened and closed frequently.
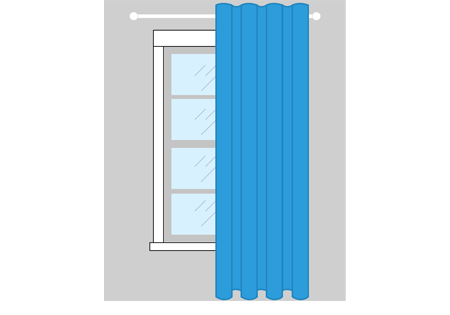

Sweep, Brushing or Cuff Length
- Choose a length 1”-3" longer than your Rod to Floor Height.
- This style is ideal for providing extra support in precise mounting situations, such as a ceiling mount.
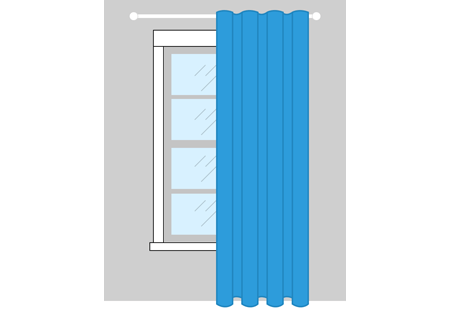

Pooling or Puddling
- Choose a length 6”-12" longer than your Rod to Floor Height.
- This style is recommended for stationary panels only.
- A small "puddle" or "break" often enhances the finished look and is a great way to disguise uneven floors.
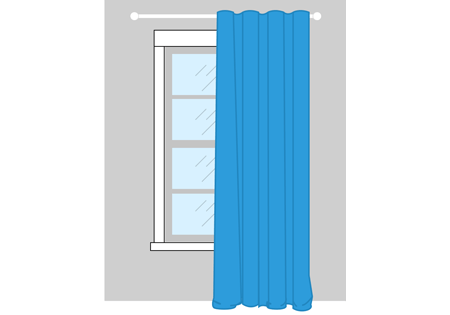

Step 5: Choose a drapery rod
When determining your rod width, note that the width does not include the finials.
Also keep in mind:
- The finials will add a width of approximately 1” to 7” on each side. You can find these exact measurements on your product’s page.
- Curtains will not move over brackets.
Other considerations when measuring for curtains and draperies
- Pleated style draperies consisting of only one panel will need to be attached to the drapery rod with C-rings instead of fully closed rings. This is because there will be extra center support brackets. A full panel is normally used for openings such as a sliding door.
- With pleated style curtains, pin locations can be different. Most pins can be adjusted up or down to account for your height.
- Pleated style drapes can work with a traverse rod or a regular rod with rings.
- Pleated, grommet and rod pocket drapes will have at least 1” fabric headers.
- Grommet style panels are normally used as decorative panels.
- 200% fullness is built into the size you order your curtains.
